広告
「メールでのお問合せ」「お電話でのお問合せ」の部分も作っておきましょう。
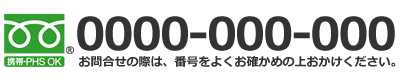
電話番号の部分に画像を利用するので、ダウンロードしたサンプルファイルからcontact0001.pngをコピーして、あらかじめimagesフォルダに追加してください。
画像ファイル:contact0001.png

ちなみに、フリーダイヤルのロゴマークは、NTTコミュニケーションズのウェブサイトからダウンロードすることができます。
contact_jisaku に以下の記述を追加してください。
<!DOCTYPE html>
<html>
<head>
<meta charset="UTF-8">
<link rel="stylesheet" href="base.css">
<link rel="stylesheet" href="table.css">
<title>お問合せ|ウェブサンプル株式会社</title>
</head>
<body>
<div id="pagebody">

	<!-- ヘッダ -->
	<div id="header">
	<h1><a href="index "><img src="https://www.htmq.com/wp-content/themes/htmq/htmq-images/logo.png" alt="ウェブサンプル株式会社"></a></h1>
	</div>

	<!-- メインメニュー -->
	<ul id="menu">
	<li><a href="index ">ホーム</a></li>
	<li><a href="product ">製品紹介</a></li>
	<li><a href="profile ">会社概要</a></li>
	<li><a href="contact ">お問合せ</a></li>
	</ul>

	<!-- ヘッダ画像 -->
	<div id="img_subpage">
	<img src="./images/img_contact.png" alt="お問合せ">
	</div>

	<!-- サブメニュー(左カラム) -->
	<div id="submenu">
		<h2>お問合せ</h2>
		<ul>
			<li><a href="#info0001">フォームからのお問合せ</a></li>
			<li><a href="#info0002">メールでのお問合せ</a></li>
			<li><a href="#info0003">お電話でのお問合せ</a></li>
		</ul>
	</div>

	<!-- インフォメーション(右カラム) -->
	<div id="info">
		<h3 id="info0001">フォームからのお問合せ</h3>
		<form method="post" action="xxxxxxxx.php" id="form1" name="form1">
		<table class="profile">
		<tr>
		<th>お問合せ区分</th>
		<td>
			<label><input type="radio" name="sort" value="1">商品に関するお問合せ</label><br>
			<label><input type="radio" name="sort" value="2">採用に関するお問合せ</label><br>
			<label><input type="radio" name="sort" value="99">その他のお問合せ</label>
		</td>
		</tr>
		<tr>
		<th>メールアドレス</th>
		<td><input type="email" size="30" name="mail" id="mail" required></td>
		</tr>
		<tr>
		<th>お名前</th>
		<td><input type="text" size="20" name="namae" id="namae" required></td>
		</tr>
		<tr>
		<th>お問合せの内容</th>
		<td><textarea name="naiyou" cols="40" rows="5" placeholder="できるだけ詳しくご記入ください。" required></textarea></td>
		</tr>
		</table>
		<input type="hidden" name="q" value="1">
		<p><input type="submit" value="送信する"></p>
		</form>
		<hr>

		<h3 id="info0002">メールでのお問合せ</h3>
		<p>

		までメールをお送りください。
		</p>
		<hr>

		<h3 id="info0003">お電話でのお問合せ</h3>
		<img src="https://www.htmq.com/wp-content/themes/htmq/htmq-images/contact0001.png" alt="電話番号0000-000-000" class="infoimg_tel">
		<div class="remarks">
		<h4>受付時間</h4>
		受付時間は、平日午前9時から午後5時までとなります。
		</div>
		<hr>
	</div>

	<!-- フッタ -->
	<div id="footer"><small>Copyright (c) ウェブサンプル株式会社 All Rights Reserved.</small></div>

</div>
</body>
</html>
次に、スタイルシートで電話番号画像の表示形式と表示サイズを調整しておきましょう。
CSSファイルのbase.cssに以下の記述を追加してください。
@charset "utf-8";

/*============================================
全般的なスタイル
============================================*/
* {
	margin:0; padding:0; 		/*全要素のマージン・パディングをリセット*/
}
body {
	background-color:#cccccc;	/*ページ全体の背景色*/
	background-image:url("images/bg_body.png");	/*ウェブページ全体の背景画像*/
	font-size:95%;			/* フォントサイズを95%にする */
	font-family: "MS ゴシック",sans-serif;	/* フォントの種類をゴシック系にする */
	line-height:1.5;		/* 行の高さを1.5倍にする */
	color:#333333;			/* 文字色を濃い目のグレーにする */
}
div#pagebody {
	width:1000px; margin:0 auto;			/*内容全体をセンタリング*/
	background-color:#ffffff;			/*内容全体の背景色*/
	background-image:url("images/bg_pagebody.png");	/*コンテンツ全体の背景画像*/
	background-repeat:repeat-y;			/*背景画像を縦方向に繰り返す*/
}
img {border:0;} 				/*画像のボーダーを0にする*/
p {
	width:660px;		/*幅の指定*/
	margin:10px;		/*マージン*/
	text-indent:1em;		/*インデント幅*/
}
hr {
	clear:both;		/*フロート配置をクリアする*/
	width:680px;		/*幅の指定*/
	margin:10px 0px;		/*マージン*/
	border:1px dotted #cccccc;	/*内容の区切りをグレーの点線表示にする*/
}

/*============================================
ヘッダ
============================================*/
div#header {
	height:80px;				/*ヘッダ部分の高さ*/
}
div#header h1 {
	padding:10px 0px 5px 20px;		/*見出しの位置調整*/
	font-size:18px;				/*フォントのサイズ*/
	font-family:Arial, Helvetica, sans-serif;	/*フォントの種類*/
}
div#header h1 a {text-decoration:none;} 	/*リンクの下線を無くす*/

/*============================================
メインメニュー
============================================*/
ul#menu {
	width:960px; height:50px; 	/*メインメニュー部分の幅と高さ*/
	margin:0px 20px; 		/*上下マージン0px、左右マージン20px*/
}
#menu li {
	list-style-type:none;		/*リストマーカー無しにする*/
	display:inline;			/*リスト項目をインライン表示にする*/
	float:left;			/*リスト項目を横に並べる*/
}
#menu li a {
	background-color:navy;		/*背景色*/
	color:#ffffff;			/*文字色*/
	display:block;			/*リンク部分をブロック表示にする*/
	width:240px; height:35px;	/*幅と高さ*/
	padding:15px 0px 0px 0px;	/*上パディング*/
	text-align:center;		/*テキストをセンター揃えにする*/
	text-decoration:none;		/*リンク部分を下線無しにする*/
	background-image:url(images/bg_menu1.png);	/*背景画像を指定*/
	background-repeat:no-repeat; 			/*背景画像を繰り返さない*/
}
#menu li a:hover {
	background-color:#000066; 	/*リンクにマウスが乗ったら背景色を変更する*/
	background-image:url(images/bg_menu2.png); 	/*リンクにマウスが乗ったら背景画像を変更する*/
}


/*============================================
ヘッダ画像
============================================*/
#img_index {
	width:960px; height:360px;	/*トップページのヘッダ画像の表示サイズを指定*/
	margin:5px 20px;		/*マージン*/
}
#img_subpage {
	width:960px; height:240px;	/*トップページ以外のヘッダ画像の表示サイズを指定*/
	margin:5px 20px;		/*マージン*/
}

/*============================================
サブメニュー(左カラム)
============================================*/
h2 {
	width:160px; height:43px;	/*幅と高さ*/
	padding:17px 0px 0px 100px;	/*パディング*/
	font-size:16px;			/*フォントサイズ*/
	background-image:url(images/bg_h2.png);	/*背景画像*/
	background-repeat:no-repeat;	/*背景画像を繰り返さない*/
	background-color:#000033;	/*背景色*/
	color:#ffffff;			/*文字色*/
}
div#submenu {
	width:260px;			/*幅の指定*/
	margin:10px 10px 10px 25px;	/*位置調整*/
	float:left;			/*カラムを左寄せにする*/
}
div#submenu ul li {
	list-style-type:none;		/*リストマーカー無しにする*/
}
div#submenu ul li a {
	display:block;			/*リンク部分をブロック表示にする*/
	height:45px;			/*高さを45pxにする*/
	padding:15px 0px 0px 30px;	/*パディング*/
	text-decoration:none;		/*リンクの下線を無くす*/
	border-bottom:1px dotted gray;	/*リンク領域の下部にボーダーを付ける*/
	background-image:url(images/bg_submenu.png);	/*リンク領域に背景画像を付ける*/
	background-repeat:no-repeat;	/*背景画像を繰り返さない*/
	color:#333333;			/*文字色*/
}
div#submenu ul li:first-child a {
	border-top:1px dotted gray;	/*一番上のリンクに上線を表示*/
}
div#submenu ul li a:hover	{
	text-decoration:underline;	/*リンクにマウスが乗ったら下線を表示*/
}
div#submenu ul li a:before {
	content: url("images/icon_submenu.png");/*アイコン画像を挿入*/
	margin:0px 10px 0px 0px;		/*マージン*/
	vertical-align:text-top;		/*縦方向の表示位置*/
}

/*============================================
インフォメーション(右カラム)
============================================*/
div#info {
	width:660px;			/*幅の指定*/
	float:left;			/*カラムを左寄せにする*/
	padding:10px 20px 0px 0px;	/*パディング*/
}
h3 {
	font-size:14px;			/*文字サイズ*/
	width:660px;			/*横幅*/
	padding:10px 0px 10px 20px;	/*パディング*/
	background-color:#003399;	/*背景色*/
	color:#ffffff;			/*文字色*/
	border-radius:3px;		/*角丸にする*/
}
.infoimg_index {
	width:200px; height:150px;	/*画像の表示サイズを指定*/
	margin:0px 0px 20px 20px;	/*マージン*/
	float:right;			/*画像を右寄せにする*/
}
.infoimg_subpage {
	width:400px; height:300px;		/*画像の表示サイズを指定*/
	margin:0px 20px 20px 0px;		/*マージン*/
	float:left;				/*画像を左寄せにする*/
}
.infoimg_tel {
	display:block;		/*ブロック表示にする*/
	width:400px; height:80px;	/*画像の表示サイズを指定*/
}
hr {
	clear:both;			/*フロート配置をクリアする*/
}

/*============================================
備考情報
============================================*/
div.remarks {
	margin:0px 10px 10px 10px;
}
h4 {
	color:#000066;
}

/*============================================
フッタ
============================================*/
div#footer {
	clear:both;			/*回り込みを解除する*/
	height:40px;			/*高さの指定*/
	padding:10px 0px 0px 0px;	/*パディング*/
	font-size:x-small;		/*フォントサイズを小さくする*/
	text-align:center;		/*センタリング*/
}
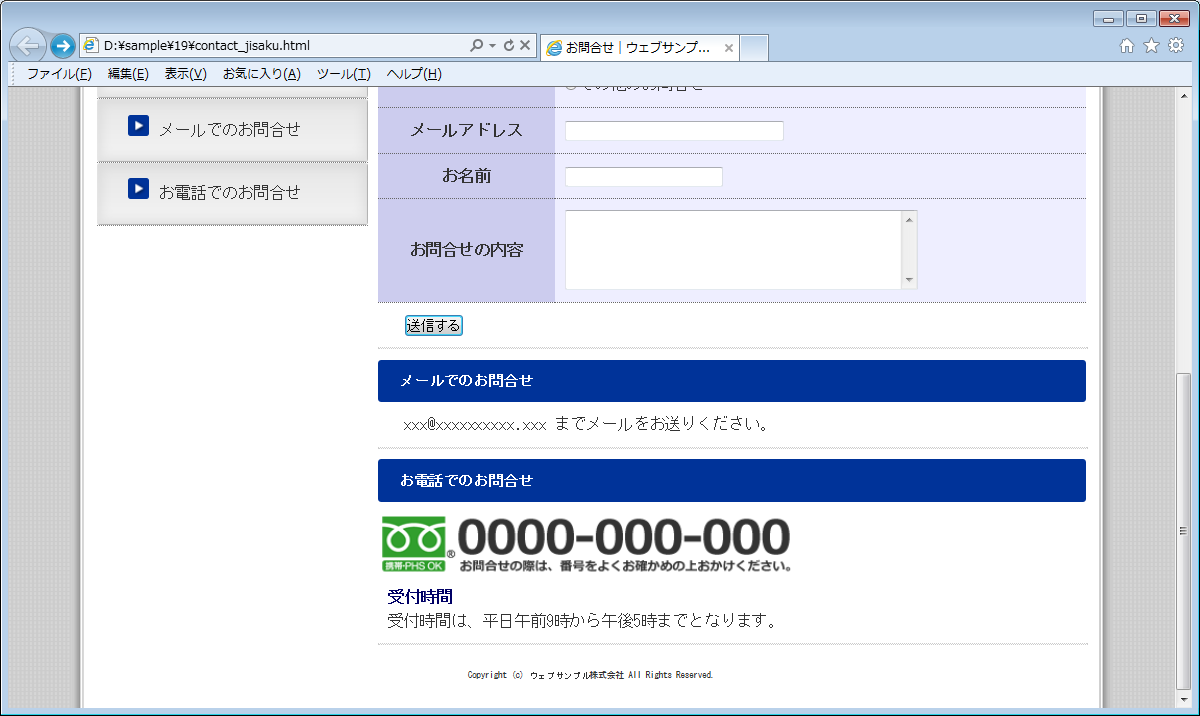
contact_jisaku とbase.cssを保存したらブラウザで表示してみましょう。
電話番号の画像などが表示されれば成功です。
変更前を確認する
ここまでの制作段階で、「お問合せ」ページは以下の状態となっています。
この段階の「お問合せ」ページを確認する
まとめ
- ユーザーによってはフォームの操作が苦手な人もいる
- フォーム以外にも問い合わせ手段を複数用意できればより良い
広告